Thankfully, it is possible to change owner name in Windows 10, though Microsoft doesn’t make it simple. You won’t find the option in the regular settings app and will instead have to make a quick edit to the registry. Luckily for you, we’ll be here to guide you through the entire process. Long story short, if you make sure to back up your registry first, you’ll be fine even if you make a mistake.
How to Change Registered Owner and Organization Name in Windows 10
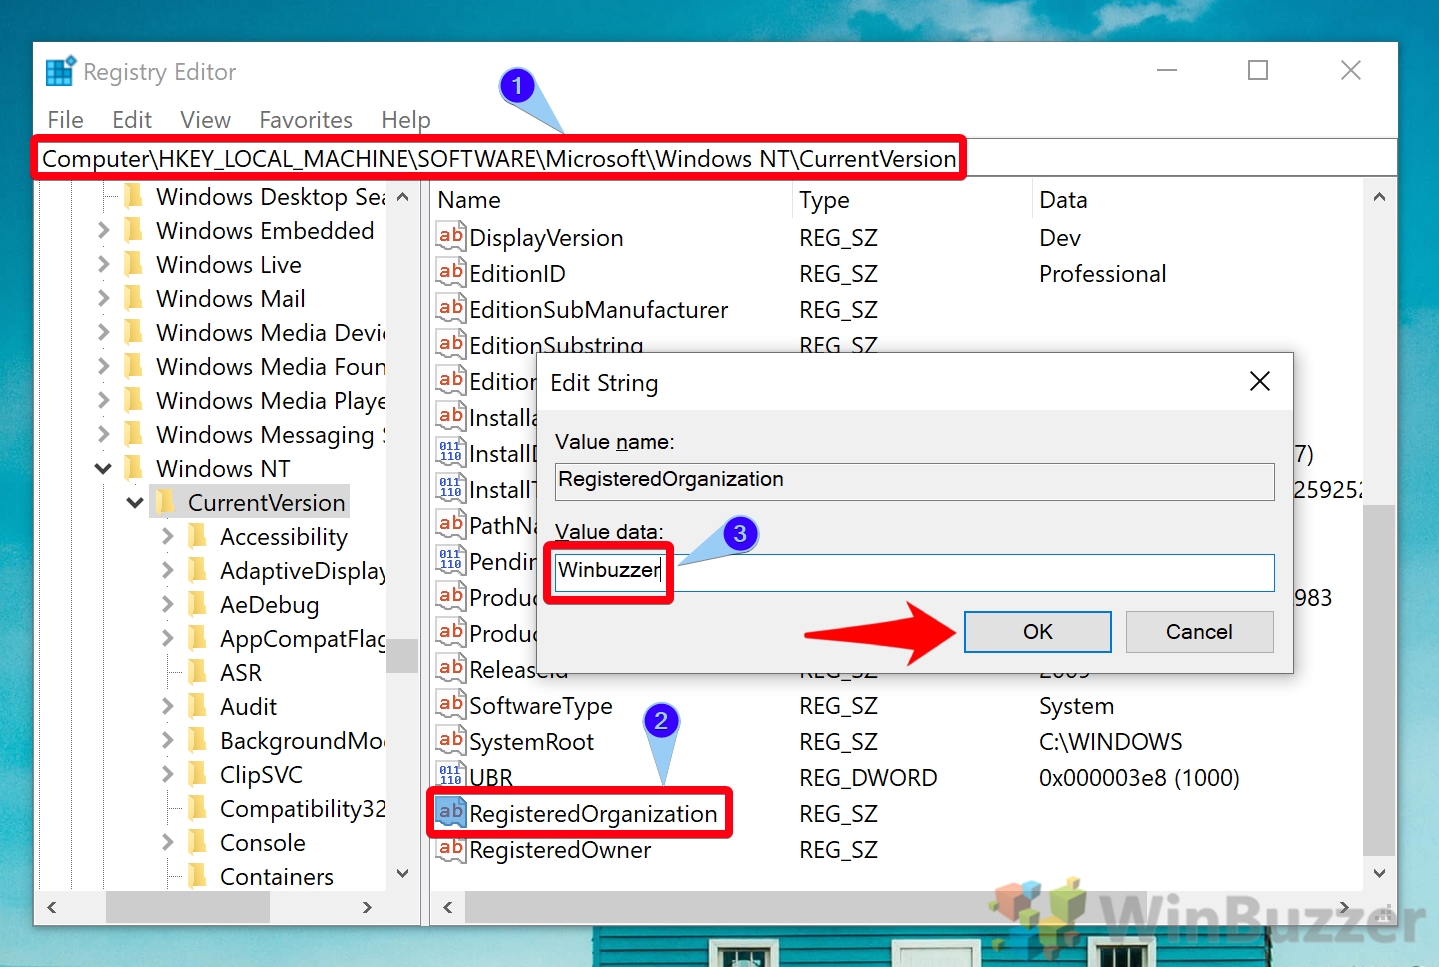
Computer\HKEY_LOCAL_MACHINE\SOFTWARE\Microsoft\Windows NT\CurrentVersion Look for the registry entry called RegisteredOrganization In the main pane and double-click it. Change the “Value data” to the organization name of your choice. In our case, that’s “Winbuzzer”. Click “OK” when you’re done.
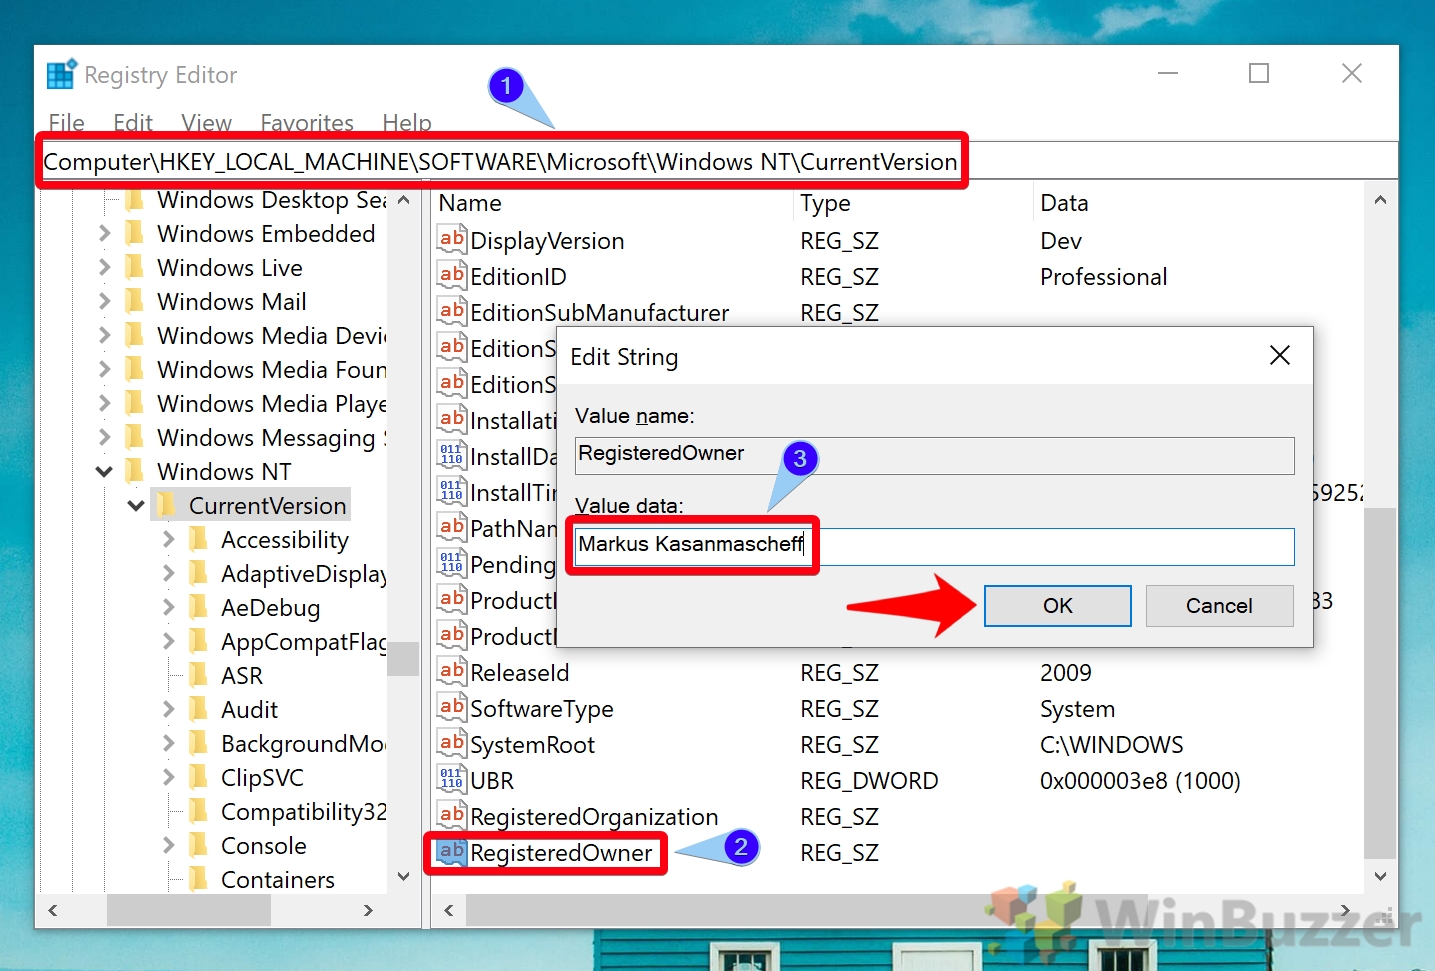
Computer\HKEY_LOCAL_MACHINE\SOFTWARE\Microsoft\WindowsNT\CurrentVersion Look for the “RegisteredOwner” entry and double-click it. Change the “Value data” to your name and press “OK”.
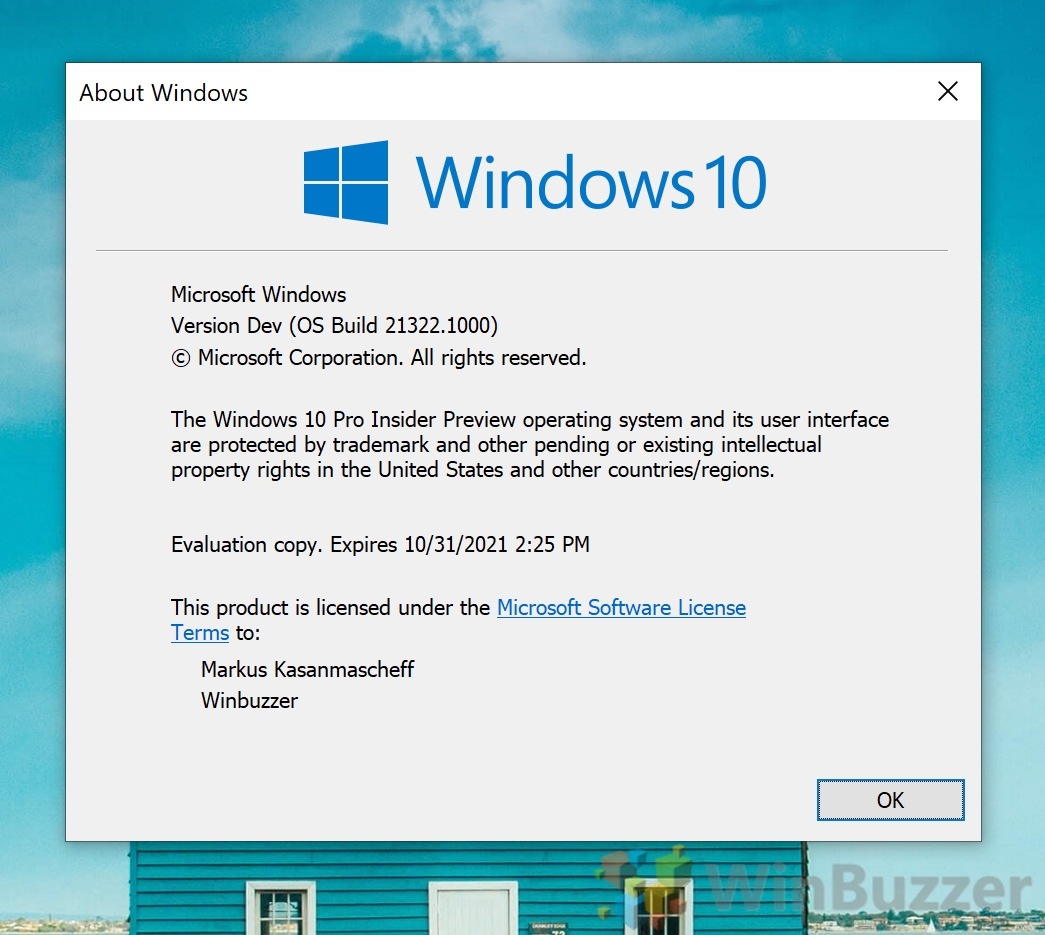
That’s it. You now know how to change owner name in Windows 10. However, you may now want to change your computer name to match, as well as your account name.